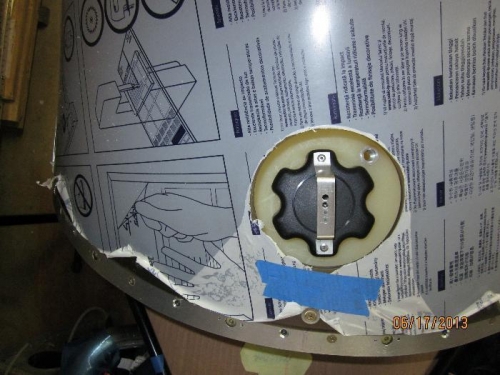
Located the center of the fuel cap on the windshield. My drill press didn't have enough reach depth to use a fly cutter to cut the 4-1/2" fuel cap access hole. I only had 4" or 5" hole saws available, so I cut a 4" hole. There is still enough finger room to remove and install the fuel tank cap.
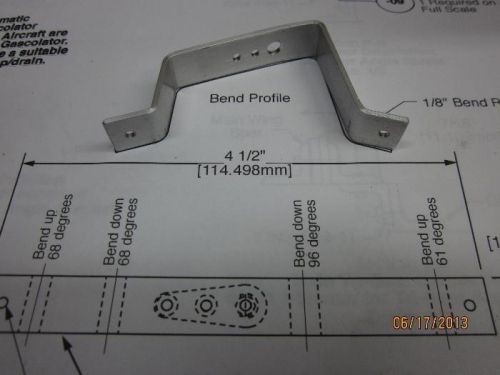
Fabricated the fuel cap cover mount strap, G01-07. I used the full size print as a pattern to locate the nesessary holes. I located the screw hole according to the print, but after bending, discovered the hole did not line up very well with the cap center. I moved the hole back to about the first rivet hole and installed the NAS444-445 anchor nut. It would have been better to hold off drilling for the anchor nut location until checking where the center of the cap ends up.
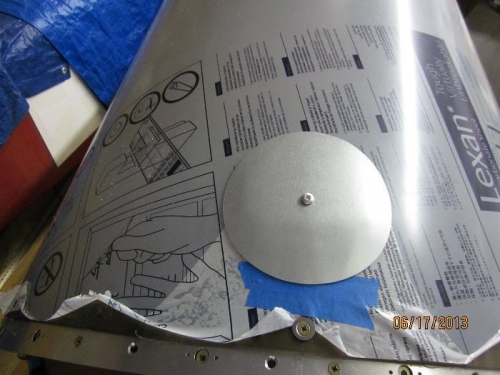
Put a slight curve in the fuel cap cover, D01-07, to approximate the windshield curve. Some final adjustment will be required when the tank is secured in place. Will also need to find a nice way to secure the screw to the cover so it won't fall out but still turn freely. Otherwise it is certain to be lost at some fill-up.
Installed the pipe fitting components in the fuel tank in preparation for a leak test. I'll use water, which will be well dried out before fuel goes in.